Deploying a static site with AWS CDK


A gentle introduction and simple hands-on tutorial to learn the basics of AWS!
Note: Following this tutorial may charge your AWS account.
UPDATE: You can now view this post in video format:
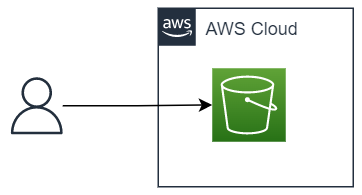
In this post we learn how to deploy a full-stack web application on AWS. The goal is to use a microservices architecture that is highly scalable and available.
This tutorial will only cover hosting the frontend which is written in React.
We will use AWS S3 to host the frontend app.
AWS Prerequisites
To get started you need the following:
- AWS CLI
- AWS Account and User
- Node.js
- AWS CDK
If you already have this set up you may skip to the AWS Architecture section.
Installation instructions now follow:
AWS CLI
Please follow the links below to install the command-line interface for Windows or MacOS/Linux.
(Windows) https://docs.aws.amazon.com/cli/latest/userguide/install-windows.html#install-msi-on-windows
(MacOS/Linux) https://docs.aws.amazon.com/cli/latest/userguide/awscli-install-bundle.html#install-bundle-other
You can run aws --version in a terminal window to confirm installation was successful.
AWS Account and User
If you don't have an AWS account you can create one here.
Once you have created an account you must create a new user:
- Start by logging into the console here
- Search for 'IAM' in the search box and click on 'Add users'
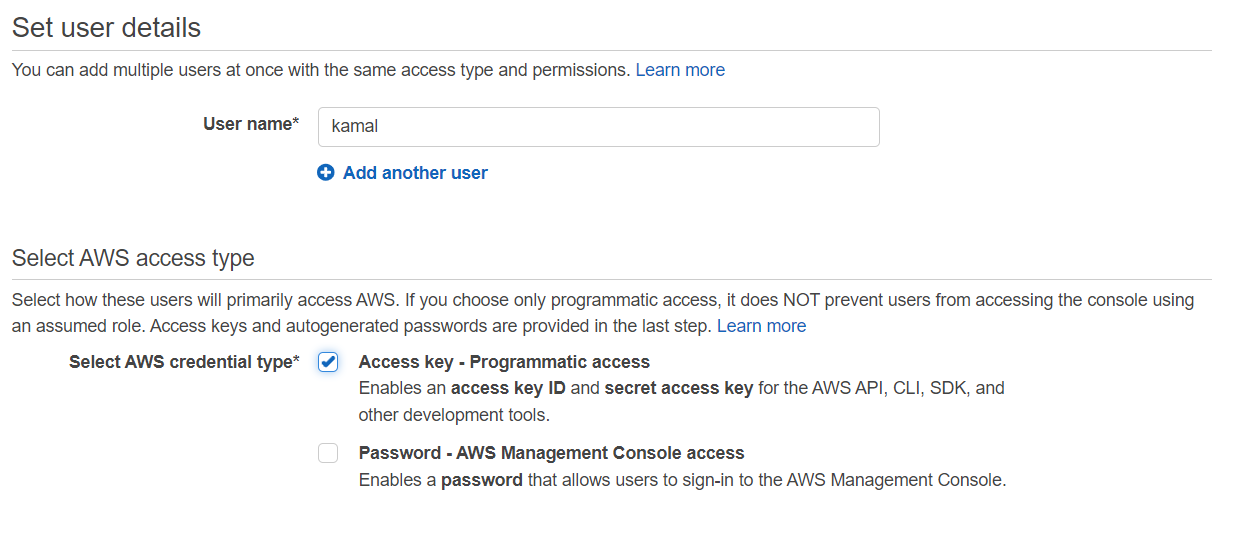
- Type a name for the user and enable Access Key - Programmatic access in the checkbox
- Click 'Next: Permissions'
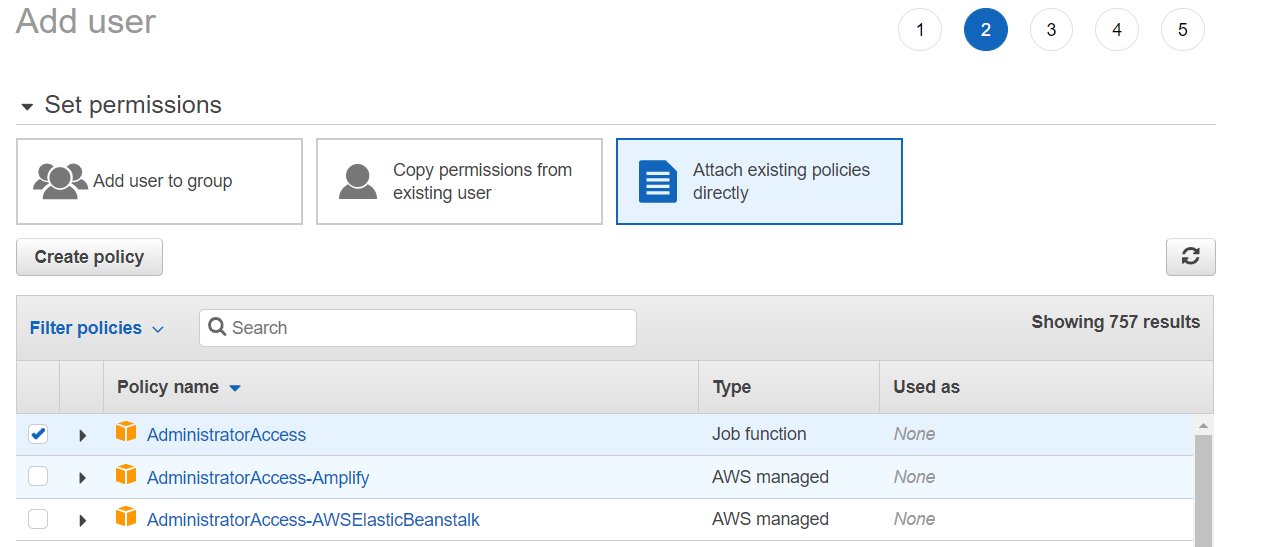
- Click 'Attach existing policies directly' and choose AdministratorAccess
- Click 'Next: Tags' and 'Next: Review'.
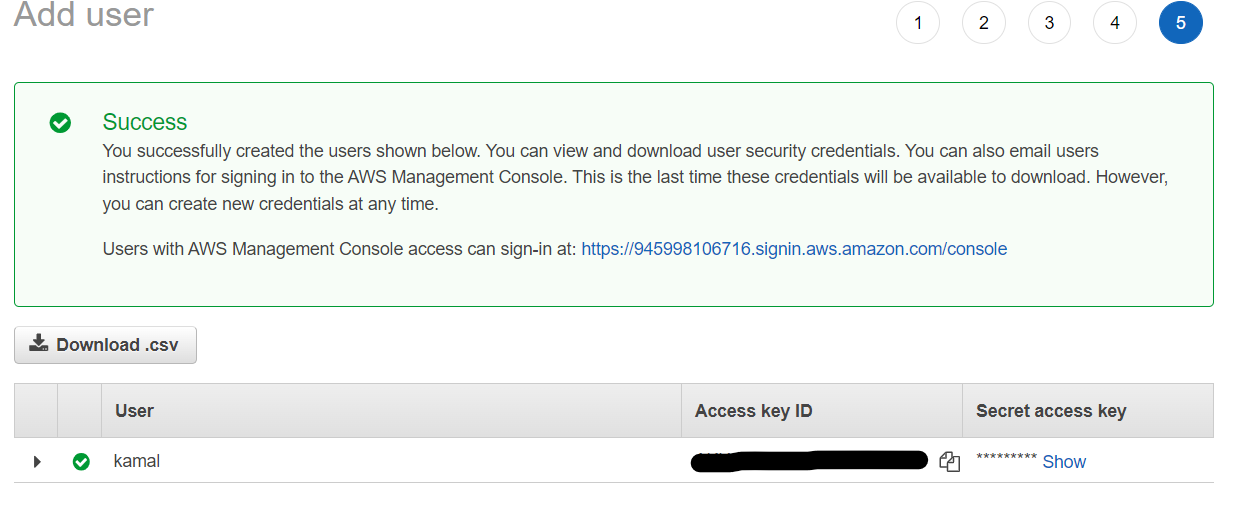
- Click 'Create User' and you will be shown the 'Access key ID' and 'Secret access key'
- Keep the window open
- Open a terminal window and type:
aws configureThen copy and paste in the access key ID and Secret access key from before. Just press enter for the 'default region name' and the 'output format'.

The AWS CLI should now be installed. The CLI is used for authentication when we deploy our app. It can be used it to make REST API calls to AWS.
Next we look at Node.js installation.
Node.js installation
You can check if you already have node.js installed by running.
node --versionThe version printed should be >= 10.13.0.
If you don't have it installed you can install it from the website.
AWS CDK
Almost there! Now we install the CDK which is what will enable us to deploy our infrastructure as code!
In a new terminal window run:
npm install -g aws-cdk
On Windows you need to run this as an administrator (Run as admin on PowerShell...)
On MacOS/Linux you may need to use sudo
Once installed, you should be able to run cdk --version in a terminal window.
Alright, now to the fun part!
AWS Architecture
The architecture for this tutorial is very simple. We use Amazon Simple storage service or S3. Simply put, S3 is an object storage that allows infinite storage capacity although there is a limit of 5TB per object.
Code
The entire repo is available here.
Go ahead and create a new project directory called feedback
Next, download the frontend part of the app from here and paste the folder frontend inside the project directory. You don't need to worry about what this code does.
Open the project in an IDE (I use VSCode), open a new terminal and cd into the frontend part of the app with cd frontend
Run the following commands to install dependencies and build the app.
npm installnpm run buildThe last command will create a build folder under the frontend directory.
Yay 😎
AWS CDK magic
The AWS cloud development kit (CDK) is a software development framework that allows us to define our cloud infrastructure as code. Using languages such as Python the code we write literally spins up the servers, databases and what ever other IT resources we require.
We define the entire infrastructure of our application. This could include services like virtual servers running Linux and managed databases like PostgreSQL.
It allows us to automate deployments so that we don't need to click around in the console to define and start services. The CDK executes the code which then outputs a CloudFormation template. The template is essentially a blueprint for all the infrastructure logic. Once deployed, the template is uploaded and AWS creates the physical resources defined in it.
CDK Code
Start by creating a new directory called cdk in the root of the project directory.
You should now have cdk and frontend as subdirectories under the feedback directory.
Cd into the directory with cd cdk and run:
cdk init sample-app --language pythonThis should create a new cdk subdirectory and build a bunch of stuff.
The directory structure should now look like:
feedback
|
|__frontend
|__cdk
   |
   |__cdk
Check to see if a .venv folder is created at feedback/cdk/.venv. You can also check the terminal window which will say if automatic python venv creation failed or not.
In case of failure, create a new python virtual environment with:
py -m venv .venvIf on Windows, activate it with .\.venv\Scripts\activate
You should see a green text on the terminal after successful activation:

With the virtual env enabled we can install Python dependencies with:
pip3 install -r requirements.txtIn my case I also needed to manually install the aws_s3_deployment package.
You can do so too with:
pip3 install aws-cdk.aws_s3_deploymentOpen the cdk/cdk/app.py file and make sure the value for the region key is the same as the default region you used earlier when you set up the AWS CLI.
If you are unsure what region it was you can check it withcat C:\Users\<MY_USER>\.aws\config:

In my case I had to change the region in app.py from us-west-1 to eu-central-1
Also change the stack name to feedback-cdk
The app.py file now looks like:
Go ahead and open cdk/cdk/cdk-stack.py then paste in the following code:
This is "the stack" and defines the AWS resources that our application is composed of. Because this is a static site, we don't need a server to host the files and it suffices to use S3.
In line 15 we create an S3 bucket, which is a container for storing the objects. We give it an id, make it publicly accessible and point out the index document.
We have only created the bucket but not yet uploaded anything. For that we use the aws_s3_deployment package. We give it a source which is the directory we wish to upload (the build folder) and pass the bucket created previously as the destination bucket.
Deploy 🚀
Before we deploy the stack we must deploy a bootstrap stack.
Run:
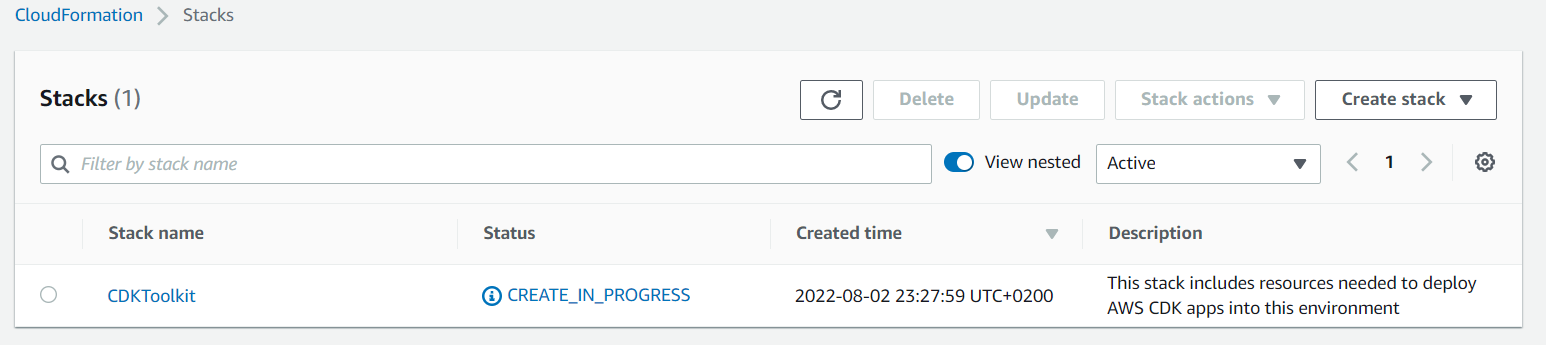
cdk bootstrapThis is a one-time deployment tied to your AWS account and creates an initial stack which is used in all subsequent AWS CDK deployments.
If you search for 'CloudFormation' in the AWS console you should now see a CDKToolkit stack being deployed:
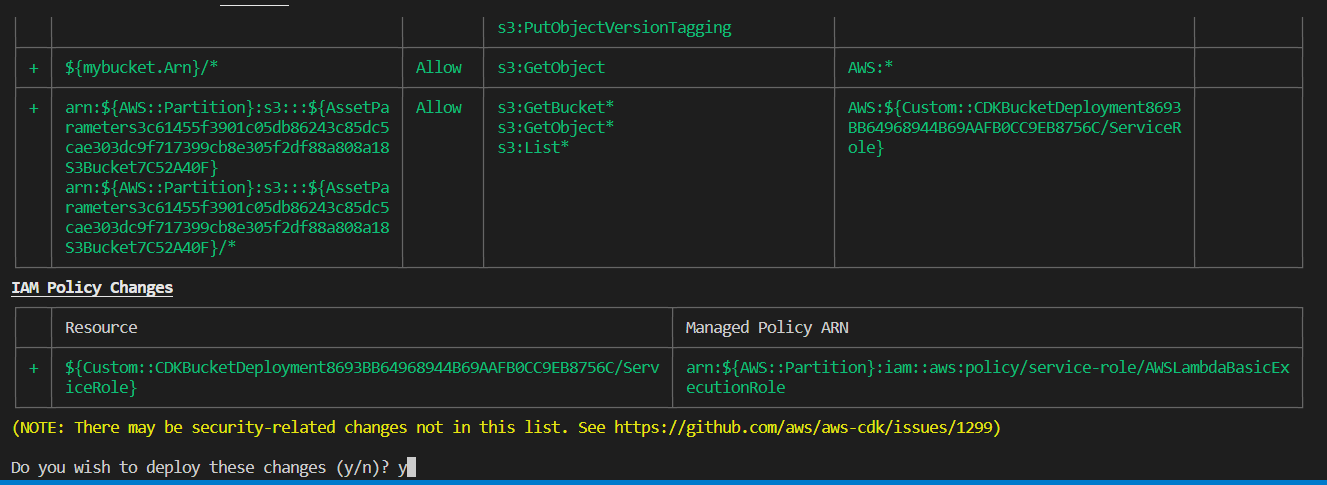
When CDKToolkitis done deploying, we can finally deploy the feedback-cdk stack with:
cdk deployType y and hit Enter to approve the changes when prompted:
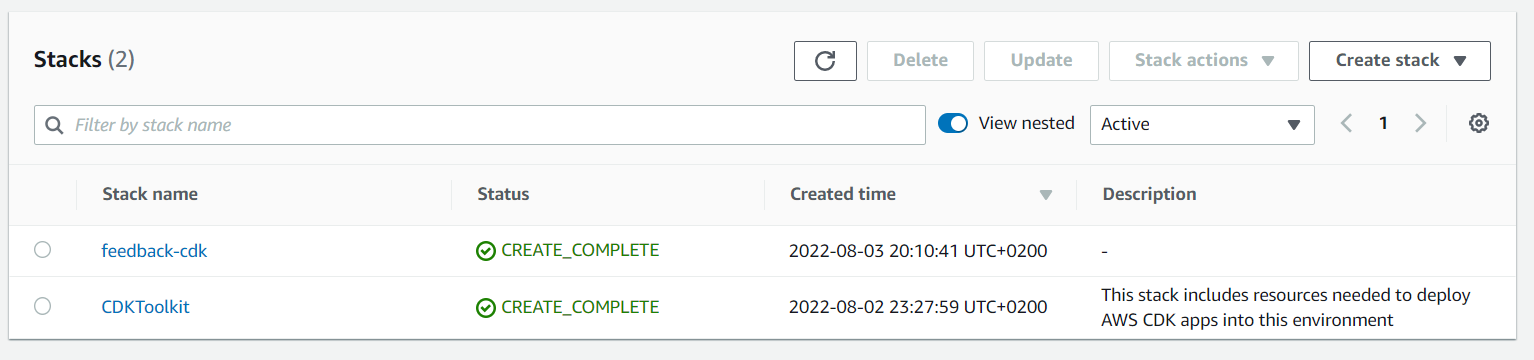
You should now see the feedback-cdk stack being deployed:
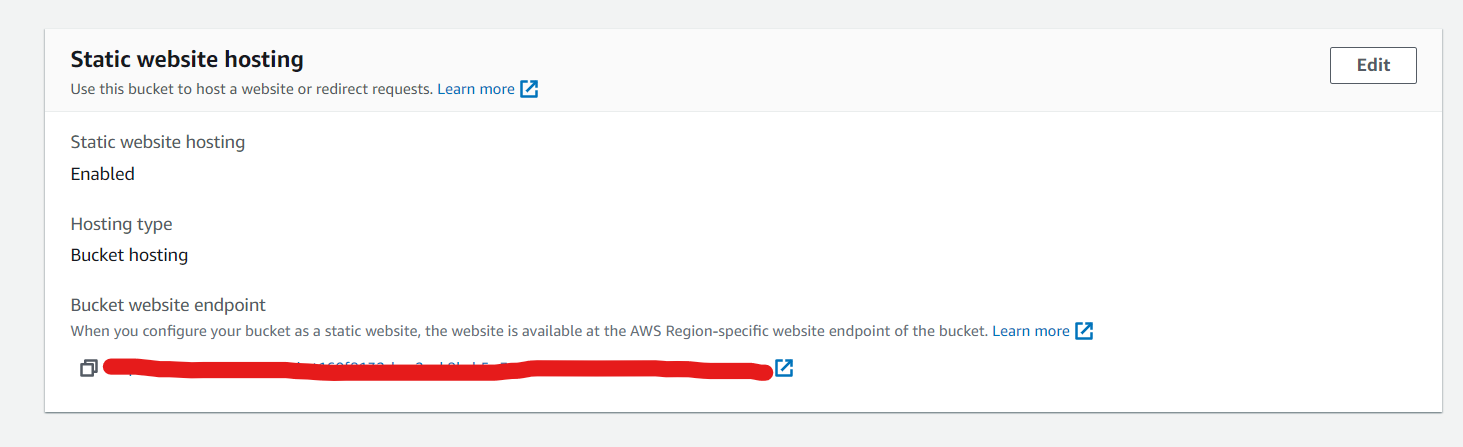
When it is finished deploying you can search for 'S3' in the console and click on the bucket containing our static frontend site. The bucket name is autogenerated but you can look for feedback-cdk in the name to find it.
Click on the bucket name, then on the 'Properties' tab and scroll all the way down till you find the 'Static website hosting' title.
The Bucket website endpoint will be given there.
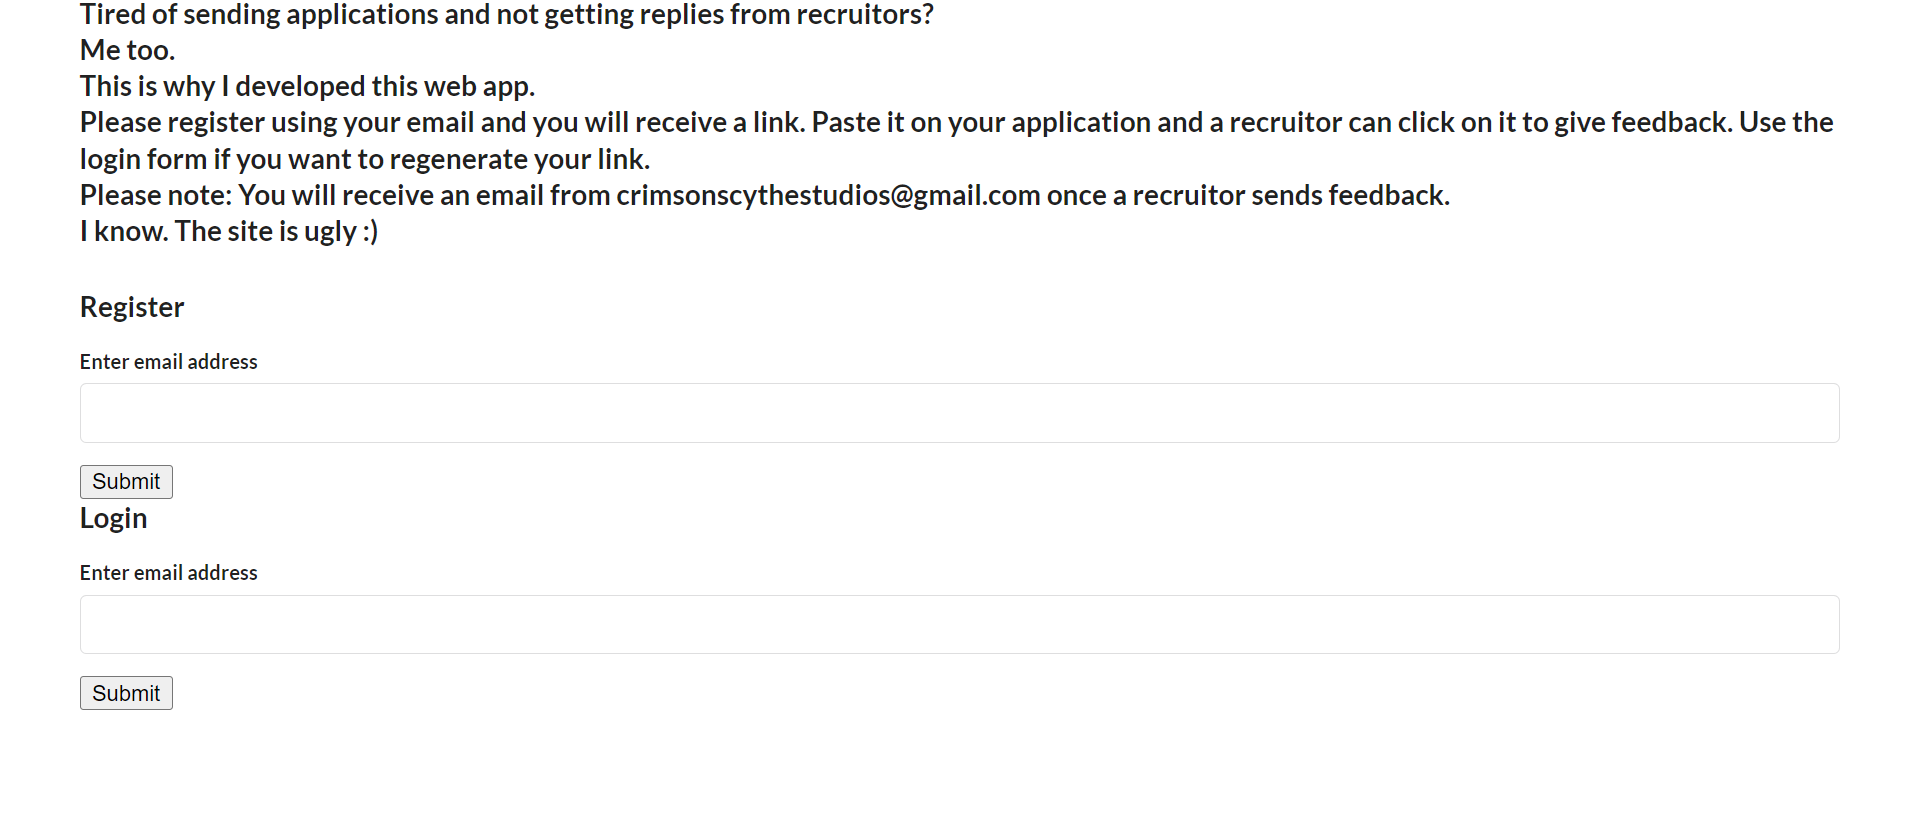
This is the URL for the frontend!
You can click on it and a webpage should open up like this:
Phew that was a handful!
Conclusion
Congratulations, you have just deployed a static site using the AWS CDK🥳
This is just the tip of the iceberg when it comes to what you can build.
Before concluding it must be mentioned that you are billed for the resources you use when deploying to AWS. In the case of S3 you are billed for storage while for something like EC2 (virtual servers) for compute time.
To prevent charges to your AWS account go ahead and run:
cdk destroyThe stack should now be destroyed.
For S3 however, deletion does not occur automatically, so you need to empty the bucket and then delete it. You may also delete the bucket created by the bootstrap (search for 'S3' in the console). Also you may delete the CDKToolkitstack created during the bootstrap phase. You can find all deployed stacks by searching for 'Cloudformation' in the console.
In the next post we will look at the backend code and deploy it with AWS CDK.
Enjoyed this article? Please consider subscribing using the form below😇
It is 100% free. You get an email every time I post + access to premium content in the future. Connect with me on LinkedIn or follow on Twitter.