Building a simple API with Python and Flask


APIs are the foundation and building blocks of modern software. They are the gateway that allows one software process to interact and communicate with another. You will come across APIs no matter what tech job you work in. Data scientists and frontend developers too need to understand and use APIs.
In this post I will outline how to build an API using Python and Flask. We will use Postman to test the API.
We will model a very simple library service that allows a user to register and borrow a book from the library.
Setup
Begin by installing the Flask package:
pip install FlaskWe also need the pandas package:
pip install pandasYou can get Postman from here Download Postman | Get Started for Free.
Dummy data
We will be using two CSV files to simulate data for this tutorial. In a real world scenario a database such as PostgreSQL or MongoDB would be used. That will be the topic for another post.
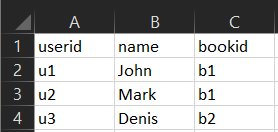
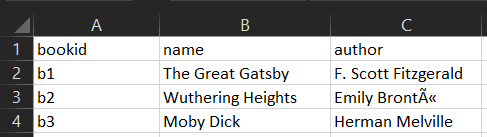
You can download the Users.csv and Books.csv data files.
Initializing Flask app
We begin by importing some modules and then we initialize the Flask app.
from flask import Flask, request, jsonify
import pandas as pd

app = Flask(__name__)
Endpoints
Our API will have two endpoints. The first one being /api/users/ and the second one /api/books/.
The /api/users/ endpoint will support the HTTP methods GET, POST, DELETE calls while the /api/books/ endpoint will support GET. The API will allow us to get a list of all users, register a new user and delete a user. Through the books endpoint we will be able to get the book that is borrowed by a particular user.
As you will see soon our API can be called through the url 0.0.0.0:5000/. Since we are not deploying the API in this tutorial the API can only be accessed by you through your development machine.
Let’s begin coding the endpoints!
@app.route('/api/users', methods=['GET', 'POST', 'DELETE'])
def users():
     pass


@app.route('/api/books', methods=['GET'])
def books():
    pass
We use something called a Python decorator denoted by @app.route. This is simply a reference to a built-in function in the Python standard library that calls the function specified when a call is made to the url given.
The HTTP request methods that the endpoint supports is also given as a list.
Starting the server on localhost
We use the app.run command to run the app. We set the debug flag so that the server restarts automatically when we make changes to the code.
if __name__ == '__main__':
    app.run(debug=True)
You can now start the server with :
py flaskapi.py The following output will be visible in the commandline:
(torchenv) PS C:\Users\hasee\Documents\blog\flaskapi> py .\app.py
 * Serving Flask app 'app' (lazy loading)
 * Environment: production
   WARNING: This is a development server. Do not use it in a production deployment.
   Use a production WSGI server instead.
 * Debug mode: on
 * Restarting with stat
 * Debugger is active!
 * Debugger PIN: 131-081-494
 * Running on http://127.0.0.1:5000/ (Press CTRL+C to quit)
Yay! The API is now up and running. Next, we code some business logic so that the API actually does something.
Users endpoint
The GET request is very simple. We just need to read the csv file and return it. We use pandas to read the file as a dataframe object. We convert this to a dictionary which makes it prettier to view in the JSON format. A status code of 200 is returned to indicate a successful request.
@app.route('/api/users', methods=['POST', 'GET', 'DELETE'])
def users():
    # gets all users
    if request.method=='GET':

        df = pd.read_csv('users.csv')
        return {'users': df.to_dict()}, 200
We can now test the endpoint in Postman by:
- Selecting GET in the dropdown
- Writing http://0.0.0.0:5000/api/users in the request URL
- Press Send
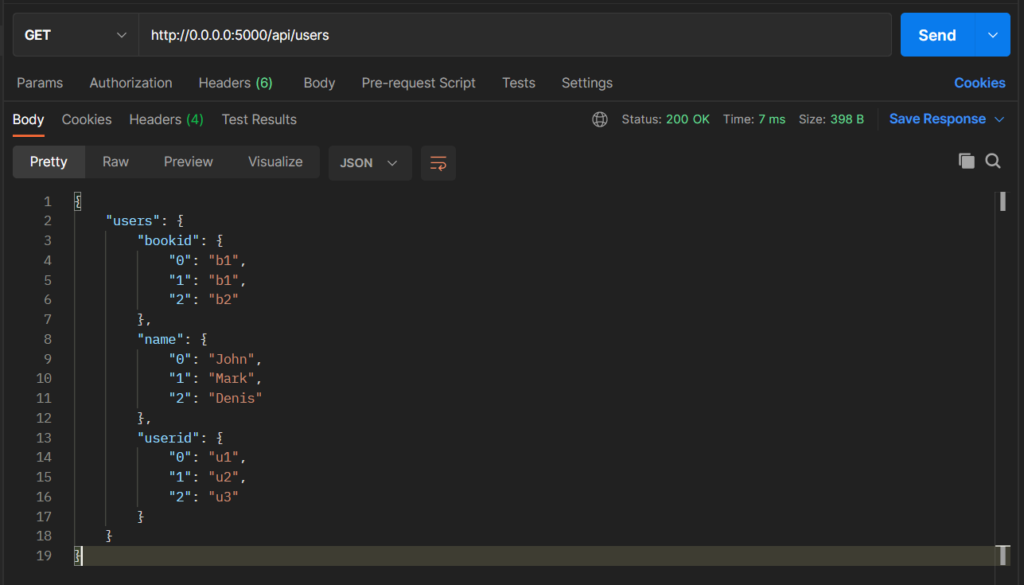
We see the users displayed in the body tab in Postman.
A status code of 200 is also displayed in the upper right hand side.
Next we write up the POST request logic. We want this method to insert a new user into the CSV file and then update the CSV file. To insert a new user we need to pass some properties that define a user. These are the userid, name, bookid properties. A status code of 201 is used to indicate that a resource has been created.
# inserts new user
if request.method=='POST':

        #insert new row in dataframe
        df = pd.read_csv('users.csv')
        data = request.get_json()
        user=[data['userid'], data['name'], data['bookid']]
        df = df.append(pd.Series(user, index=df.columns), ignore_index=True)
        df.to_csv('users.csv', index=False)

        return {'message': 'user added'}, 201
If you are unsure where the code goes you can check the Github Gist here.
Like before, we start by reading the csv file. Then we use the request object to extract and parse the data provided in the request as JSON. We can then index the data variable to get the userid, name and bookid provided through Postman. We store these values in a list which we call user.
In order to update the csv we use the append function of the dataframe. For this to work the data to be appended must be a pandas Series object. The Series object takes an array as argument. The user variable created earlier is an array so we pass it in and create a Series. We must also specify the index=df.columns flag to ensure the data gets appended under the correct column names.
Once this is done we simply overwrite the csv file and return a HTTP 201 along with a successful message response.
Phew! It can take some used to when working with pandas dataframes and series but it gets easier with practice.
Now we test using Postman!
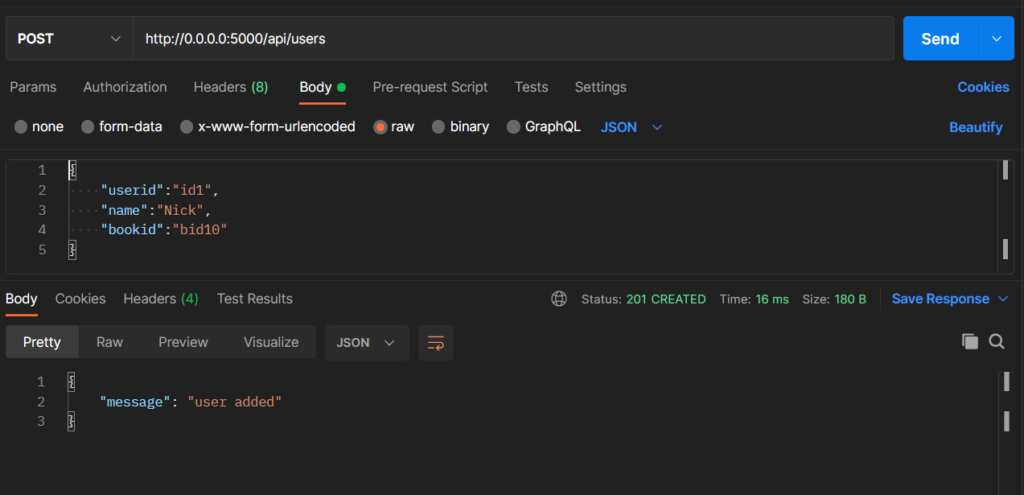
We:
- Select POST from the dropdown
- Insert http://0.0.0.0:5000/api/users in the request URL field
- Switch to the Body tab, select raw and JSON from the dropdown
- Enter the properties for the new user
- Click Send
You can copy the properties from here:
{
    "userid":"id1",
    "name":"Nick",
    "bookid":"bid10"
}
We check to see if the response code is 201. A new user has now been created and the csv has been successfully updated. You can re-run the GET request from earlier and double-check that a new user has indeed been created.
Finally we need the DELETE method. This is fairly simple. We just need some logic to delete rows from the pandas dataframe. This is done as follows:
df = df[df.name != data['name']]
Here we are keeping all rows in the dataframe where the name of a user is different from the one we want to delete.
The code looks like this:
    # deletes a user
    if request.method=='DELETE':
        df = pd.read_csv('users.csv')
        data = request.get_json()
        df = df[df.name != data['name']]
        df.to_csv('users.csv', index=False)

        return {'message': 'user deleted'}, 200
Again we can test this using Postman as follows:
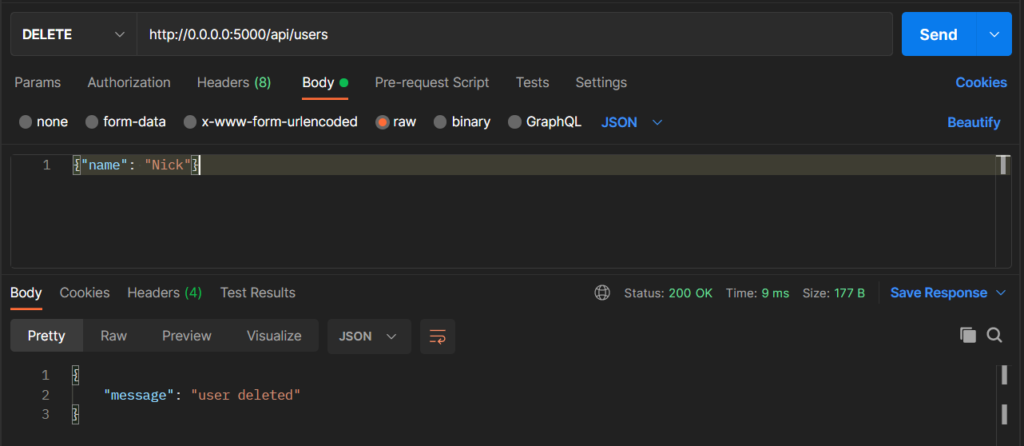
We need to remember to specify the name of the user we wish to delete as a JSON object in the body tab. Also we double-check the request type is DELETE.
Books endpoint
Finally, we code the books endpoint. This is very similar to the users endpoint. For now we only support getting the book associated with a user. Each user has a bookid property. We pass the name of the user through Postman and find the associated bookid from the users.cv file. We use the bookid to find the name of the book it refers to by searching the books.csv file.
@app.route('/api/books', methods=['GET'])
def books():
    # gets all books
    df = pd.read_csv('users.csv')
    data = request.get_json()
    user = data['user']
    bookid = df[df.name == user].bookid.values[0]
    booksdf = pd.read_csv('books.csv')
    book = booksdf[booksdf.bookid == bookid]

    return {'book': book.to_dict()}, 200
We find the bookid linked to a user by indexing the users dataframe like so:
bookid = df[df.name == user].bookid.values[0]where user is the name of the user supplied through the request.
Then we find the book name referenced by the bookid by indexing the books dataframe like so:
book = booksdf[booksdf.bookid == bookid]We can test this through Postman as before:
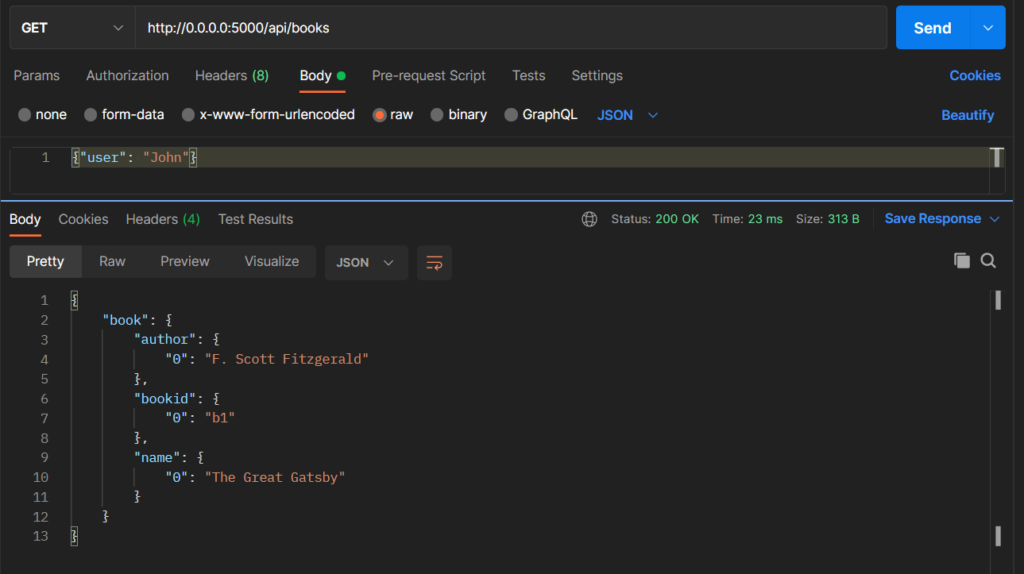
Just like the GET method of the users object we see that the book borrowed by John is returned as a response.
However, if we try to find the book associated with a user that does not exist we will get an error. In this case we want the API to respond correctly with a HTTP 404 – not found. We use a simple if statement to check whether the book ids returned are empty:
if df[df.name == user].empty:
        return {'message': 'user not found'}, 404
Done !
That’s it. You have seen how simple and straightforward it is to build an API using Python and Flask.
We have covered using the most basic HTTP methods – GET, POST and DELETE. We have also covered using Postman to test an API and how to handle cases where the request cannot be served – through a 404 response.
More Python tutorials and tips & tricks will come soon. Make sure to bookmark this site if you want to keep learning!