Slow HTTP response times? Celery to the rescue!


In an increasingly data-driven world, it is important for software engineers to build applications that are responsive and fast. As our software needs become more complex, our computing requirements also escalate. At the same time users expect responsive and snappy performance from applications they interact with on a daily basis.
Long-running background tasks are a necessary part of a majority software applications today. How do we engineer software that gracefully handles such tasks without comprising on user experience?
Imagine if a user had to keep a tab open to finish an upload or send an email. How dreadful would that be from a user experience perspective?
What we need is a way to process tasks in the background and in an asynchronous manner.
Celery and RabbitMQ
We can use the Celery framework for Python to handle background tasks. Celery is an asynchronous task queue framework written in Python. Essentially, you can think of it as a queue data structure with the FIFO (first in, first out) principle. So the first task you put into the queue gets processes first. This makes it possible to schedule tasks. It also ensures tasks are processed in the order that they are received by the application.

Celery uses the paradigm of distributed message passing which means it includes a message queue as well. In this post we will use RabbitMQ as the message queue.
Now you might be wondering, what is the difference between a task queue and a message queue.
You can think of a task queue as a way to distribute work across threads or machines. A worker is an abstraction provided by Celery that represents a parent process. A worker spawns some child processes to handle individual tasks as clients use our application. The processes spawned would scan the task queue looking for tasks to perform.
However, to send and receive these tasks we need something like a message queue also known as a message broker. This is where RabbitMQ comes in. RabbitMQ would be responsible for sending tasks from the task queue to the worker that needs it. Note it is possible to use a solution called Redis but we will stick to RabbitMQ for this post.
Let’s get on with coding now!
Setup
Note: I was not able to get things running on my Windows machine.
This post assumes a Linux or MacOS environment.
We will build a simple Flask application that sends emails to motivate the use of Celery.
Begin by installing the following Python packages:
pip3 install yagmailNext, install the Celery package:
pip3 install celeryUnfortunately, due to security reasons it is not possible to simply send an email programmatically.
If you use Gmail you can follow the guide here under “Create & use App Passwords” to set up a one-time password for your Gmail account. Remember to note down the password.
Next, create a file named default_settings.py and enter the following constants where you replace with your email and password:
MAIL_USERNAME = <Username>
MAIL_PASSWORD = <One-time password>
Next, install RabbitMQ from here (Linux) and here (MacOS).
You can ensure RabbitMQ is running using the following command:
brew services listThe terminal should something like the following:

Great! Let’s code!
Initialize Celery with RabbitMQ
We begin by initializing a Celery app:
We initialize Celery by giving the name of the module it is located in, which is the name of the python file. The second argument specifies the url of the message broker we wish to use. The url: broker=’pyamqp://guest@localhost//’, is the default one for RabbitMQ.
We also initialize a yagmail instance which is pretty straightforward.
Also you will notice that we set a timer for 5 seconds to simulate a long-running task.
Then we define a regular Python function responsible for doing some long-running computation and thereafter sending an email to notify the user that the processing is complete. This could be something like a image processing, video encoding or speech transcription.
Finally, the function is annotated with the @ symbol which indicates that we are wrapping with a decorator function provided by the celery package. Check out my post here where I explain decorators in plain English with examples so you can follow. In short the annotation indicates that this is a Celery task. This means that this function would be delegated to worker processes and handled by the Celery framework.
So far so good!
Next we build a simple Flask application:
We remember to import the sendMail function from the celery py file. In line 9 we simply call:
sendMail.delay(data)This is the way to “invoke” a Celery function. The function call is added to the Celery task queue and sent by RabbitMQ to a worker process that is available.
The key takeaway here is that the function returns immediately – the call is asynchronous.
This means that the return call on the next line gets executed without delay. This further means the the user does not need to wait for the processing to occur before he/she gets a HTTP response back.
Run Celery and Flask
Since Celery acts as a standalone service we need to actually run it in a separate terminal instance.
Begin by executing the Flask app like so from a terminal:
python3 app.pyNext, open a separate terminal instance and execute the following command: This starts the Celery service.
celery -A mailasync worker --loglevel=INFOHopefully, you should see something like the following. (Flask on right, Celery on left.)

Testing using Postman and temp mail
Wonderful!
Next, we test using Postman. First go to https://temp-mail.org/ and copy the email address shown, also keep the browser tab open. This email is discardable and temporarily which means it is perfect for testing.
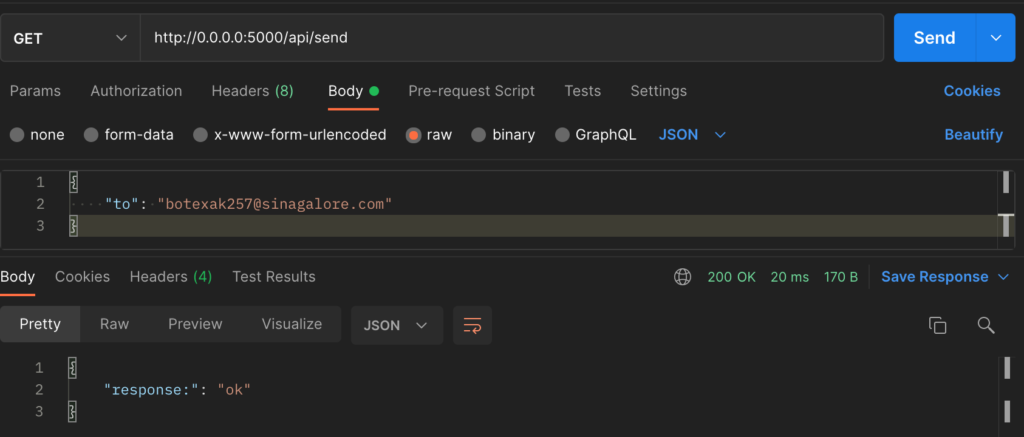
In the body of Postman remember to replace the email under “to” with the one shown in temp-mail.
Once you hit send, you should get a HTTP 200 response immediately although there is a timer of 5 seconds in the actual code. Thus, you can see the asynchronous Celery code in action.
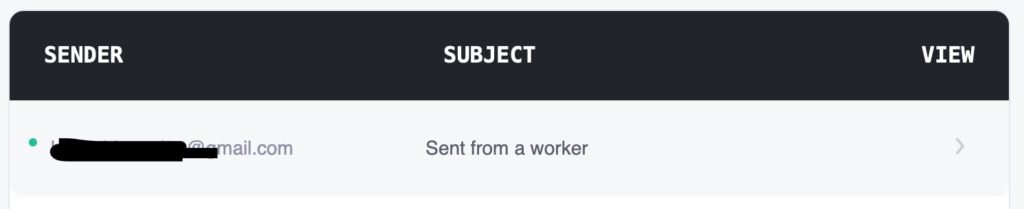
As expected you can check the temp mailbox and confirm that the Celery worker sent the email after 5 seconds:
Recap
Awesome! This is it for this post.
We use Celery for long-running background tasks that need time to process. Celery takes care of delegating these tasks to processes across the application. Ensuring they are processed in the order they were sent. We used RabbitMQ as a message broker to handle sending and receiving of tasks within Celery.
In short, using Celery means that users do not have to keep tabs open while the server is processing their request. That is, they will immediately receive a HTTP response.
It is also possible to keep track of tasks in Celery. You will also have noticed that we did not need to use the return value of our Celery worker function. There may be cases where the return value needs to be used within the application. That requires additional configuration though and will be a topic for another post.
Hope you enjoyed this post.
I post tidbits on Twitter related to Python. Consider following me here: Haseeb Kamal (@mhaseebkamal) / Twitter
You can also find me on LinkedIn here: Muhammad Haseeb Kamal | LinkedIn
You can find more code here.